Accelerate your development process and allow your readers to experience your APIs directly from the API Reference by utilizing an integrated API playground. This hands-on feature enables users to interact with and test your APIs in real-time, enhancing their understanding and engagement.
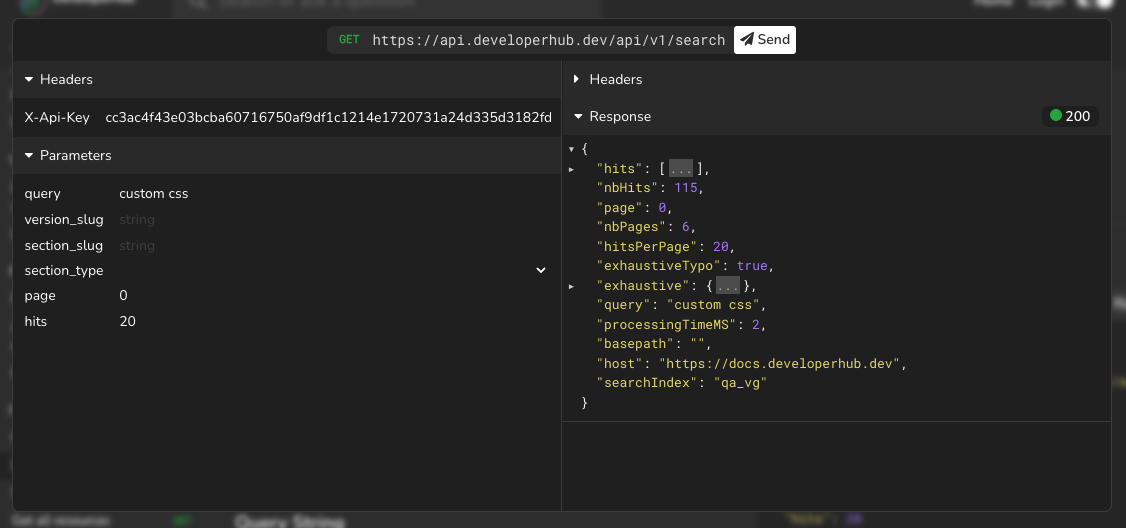
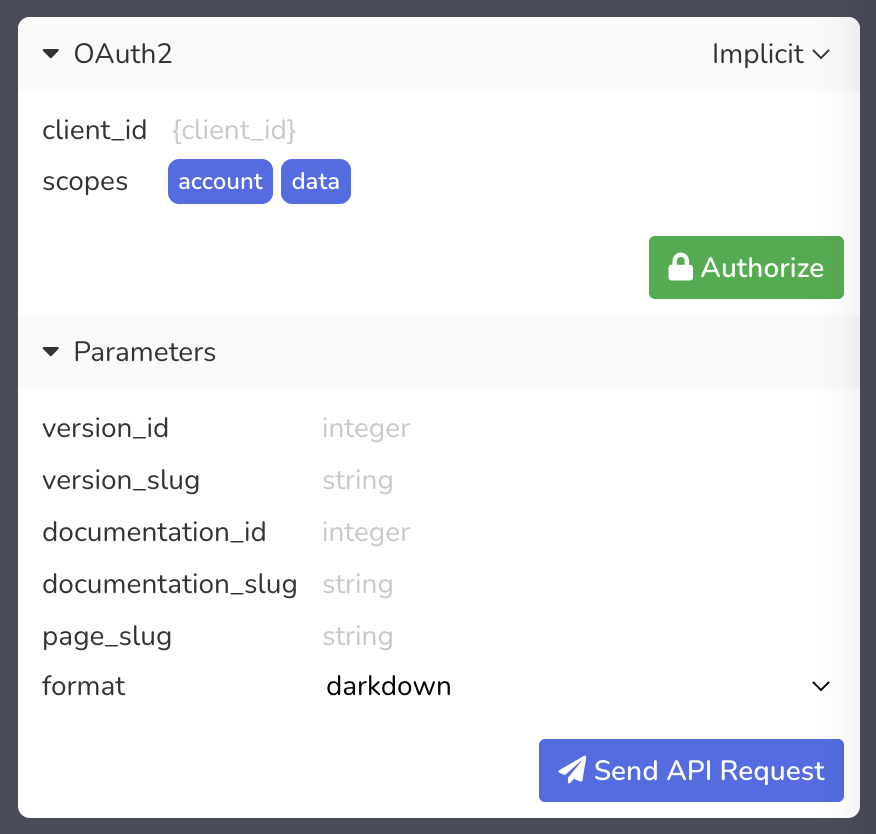
With Try It Out, all headers, query parameters, form data, and request body fields come with example values from your OpenAPI spec. Readers can change these fields and send an API request directly from the API Reference. The headers and parameters are checked for their type, and available enums are displayed. Users can start OAuth 2.0 flows directly from the API reference to obtain access tokens.
The response of the API request will be displayed alongside the corresponding status code. Users can hover over the status code to access and view the detailed response headers.
Prerequisites to Enabling Try It Out
Before enabling try it out, there are two external configurations that you must perform:
- To configure the CORS headers for your documentation domain, it is essential to ensure that all requests are processed directly by the browser. This requires you to establish CORS headers that grant permission for the documentation site to interact with your API. The CORS settings should permit the documentation site origin to make any type of HTTP request, and you should allow all headers that you may potentially send. In addition, it is crucial to expose all headers that are returned in the response.
The CORS headers in your server's response should be structured as follows:
xxxxxxxxxxAccess-Control-Allow-Originyour.docs.com # change to your docs site originAccess-Control-Allow-MethodsGET, POST, PUT, DELETE, OPTIONS, PATCHAccess-Control-Allow-HeadersAuthorization, Content-Type, AcceptAccess-Control-Expose-Headers*Access-Control-Max-Age86400- (Optional) Configure your OAuth2 client to redirect to our designated redirect URL. If your API utilizes OAuth2 and you want users to be able to generate a token directly from the API playground, it is essential to include our redirect URL in your OAuth2 client settings. For further guidance, refer to OAuth 2.0 Authentication.
Enabling Try It Out
To enable the "Try It Out" feature for an API Reference, simply check the "Show Try It Out" option in the API Reference settings
Try It Out Support
Try It Out is supported for all API operations except for the following:
- Responses that do not have a JSON or plain text media type.
- Requests that upload files.
All requests are initiated directly from the browser, making it essential to configure the API to return the appropriate CORS headers specific to your documentation domain. This ensures smooth communication and data retrieval between the browser and your API.
Personalizing Authentication Values
To personalize authentication values, such as those in the header and query string, please contact us.
OAuth 2.0 Authentication
To enable OAuth 2.0 authentication within the API playground, you need to include the following redirect URL in your OAuth 2.0 client settings:
https://<docs-site>/$reader-oauth2
For example:
https://docs.developerhub.io/$reader-oauth2.
Once this is set up, you can enable OAuth 2.0 Authentication by checking the option for Show OAuth2 Authentication in the API Reference Settings
To enable OAuth 2.0 authentication within the editor, it is essential to add the following redirect URL: [https://app.developerhub.io/$reader-oauth2](https://app.developerhub.io/$reader-oauth2). Please note that this URL is intended for development purposes only and should not be utilized in a production API environment.
Custom Interceptors
Custom Interceptors provide a powerful way to modify requests prior to sending them, enabling you to tailor your application's behavior to suit specific needs. For instance, you might use them to add digital signatures or apply authentication tokens. These interceptors function as middleware and are written in JavaScript, allowing for flexible and seamless integration into your existing workflow.
How to set up Custom Interceptors?
To set up custom interceptors:
- Edit Custom HEAD Tags.
- Add a script that registers every custom interceptor needed using
window.registerCustomInterceptorfunction.
Function: registerCustomInterceptor.
Returns: Nothing.
Arguments: Function - function(data, next). Where data has the following definition:
xxxxxxxxxx{ api: { // Read-Only id: number, slug: string }, verb: string, // API verb (GET, POST, DELETE, PUT or PATCH) - Read-Only url: string, // Example: https://api.example.com/pet/dog body: string, // Most probably the JSON request body, stringified. headers: {[key: string]: string}, // Header key-value params: {[key: string]: string} // Form data or query string key-value}The <code>next</code> function is essential and should be invoked once for each custom interceptor. It takes the modified data as an argument, which is then passed on to the subsequent custom interceptor in the sequence.
Custom Interceptor Examples
- Has no effect. Only logs the data:
xxxxxxxxxxwindow.registerCustomInterceptor(function (data, next) { console.log('Custom Interceptor', data); next(data);});- Adds a new header:
xxxxxxxxxxwindow.registerCustomInterceptor(function (data, next) { data.headers['x-header'] = 'y-value'; next(data);});- Modifies form data:
xxxxxxxxxxwindow.registerCustomInterceptor(function (data, next) { if (data.params['x-param']) { data.params['x-param'] = 'y-param'; } next(data);});- Modifies JSON body only on a certain API reference:
xxxxxxxxxxwindow.registerCustomInterceptor(function (data, next) { if (data.api.slug !== 'test-api') { return next(data); } var body = JSON.parse(data.body); body['name'] = 'Apu the monkey'; data.body = JSON.stringify(body); next(data);});Troubleshooting
Request Failing
If the request fails with the message "Request failed (Unknown Error)" and status 0, it is essential to verify that CORS (Cross-Origin Resource Sharing) headers are configured properly. You can determine whether this is the underlying issue by inspecting your browser's DevTools. Specifically, in Chrome DevTools, you may encounter an error message that reads: Access to XMLHttpRequest at '<url>' from origin '<url>' has been blocked by CORS policy: Response to preflight request doesn't pass access control check: No 'Access-Control-Allow-Origin' header is present on the requested resource. This indicates that the CORS setup needs to be addressed.
No Response Headers
If response headers are not being sent, make sure that your API is returning the <code>Access-Control-Expose-Headers: *</code> header. This header is crucial as it enables the browser to access and read the response headers from your API.